restylai blog
Floor Plan Symbols Explained: How to Read Any Plan
Updated July 31, 2026 · by the restylai team
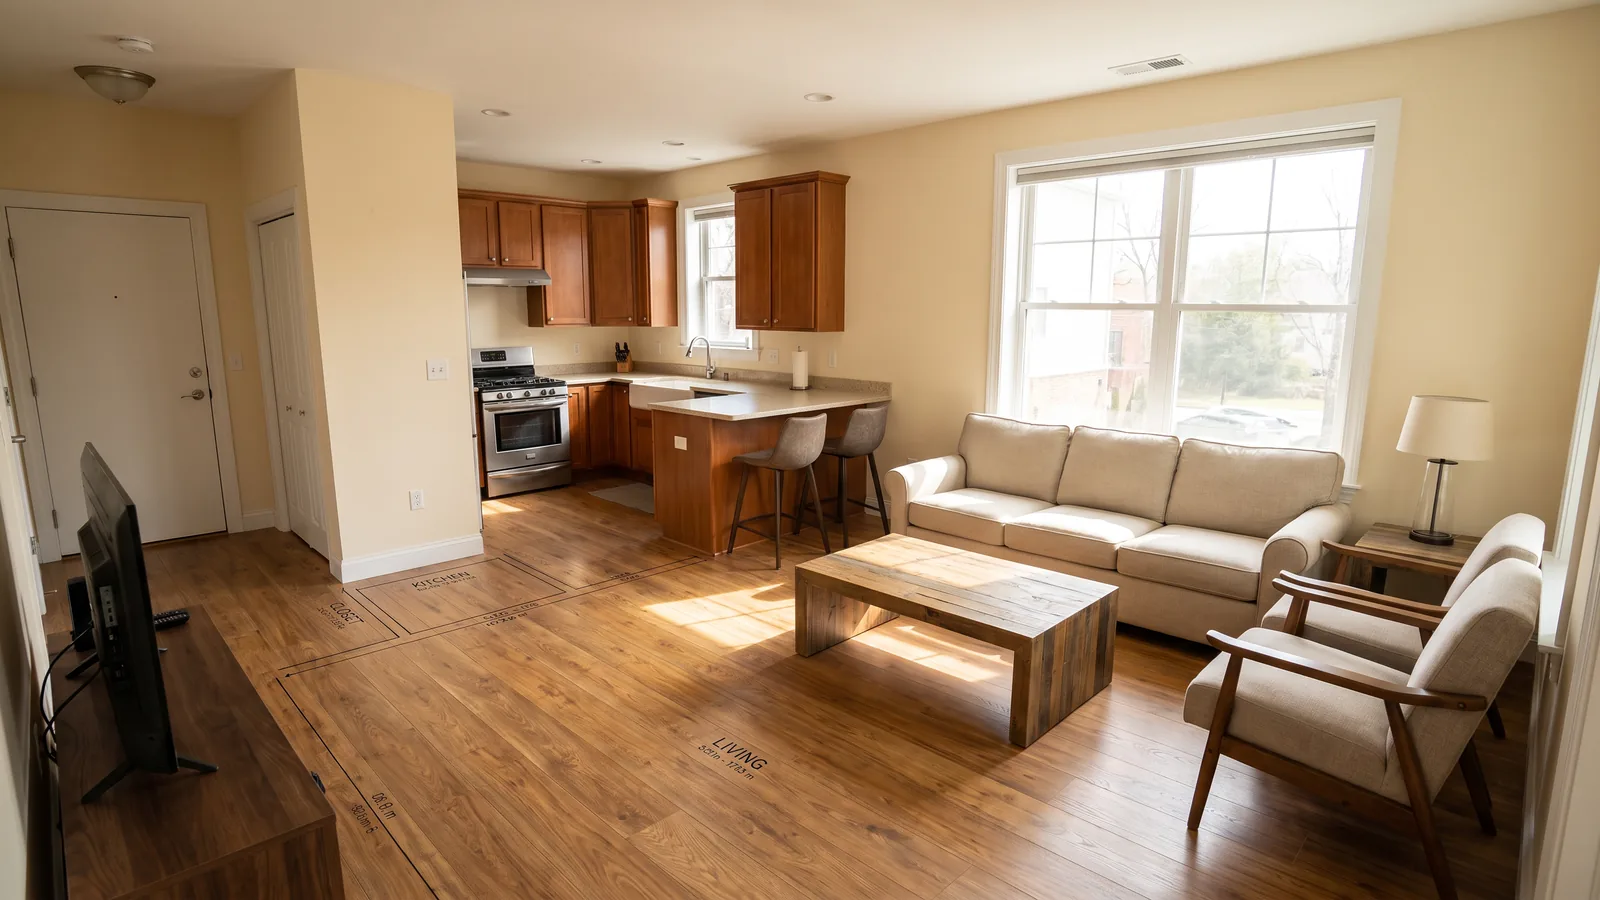
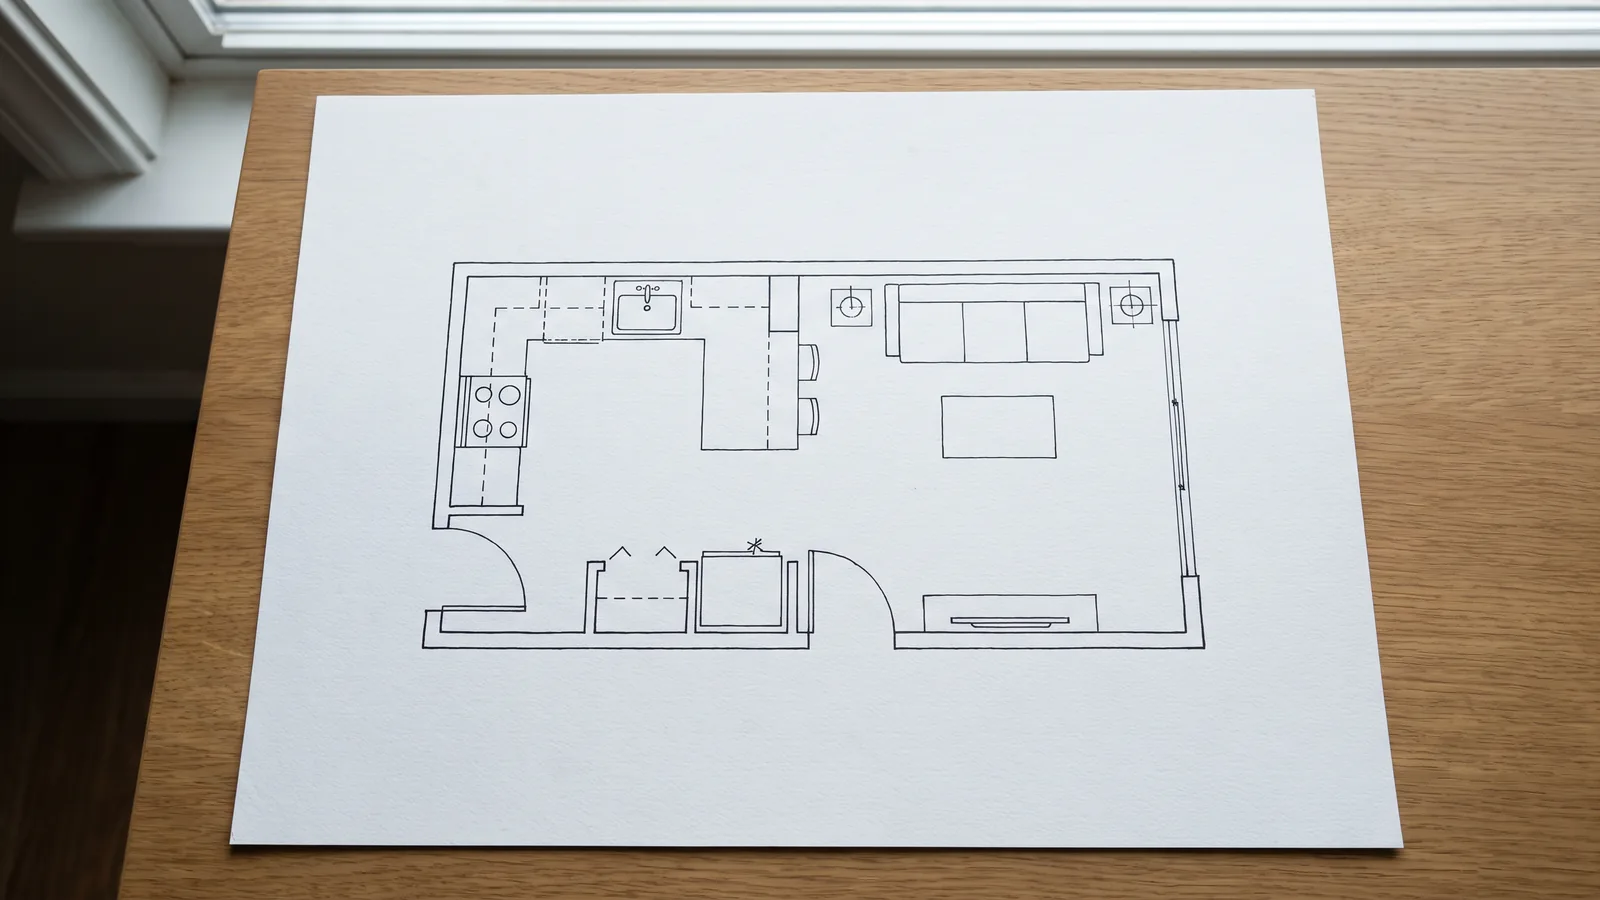 Before
The real room
Before
The real room
A floor plan is a drawing of a building sliced horizontally about a metre above the floor, with the top lifted off and the rest viewed from directly above. That single fact explains most of what confuses people: you see doors and windows because the cut passes through them, and you do not see the ceiling because it is above the cut.
What follows is every symbol you are likely to meet, with the direct answer first and the detail after it.
How to read a floor plan in two minutes
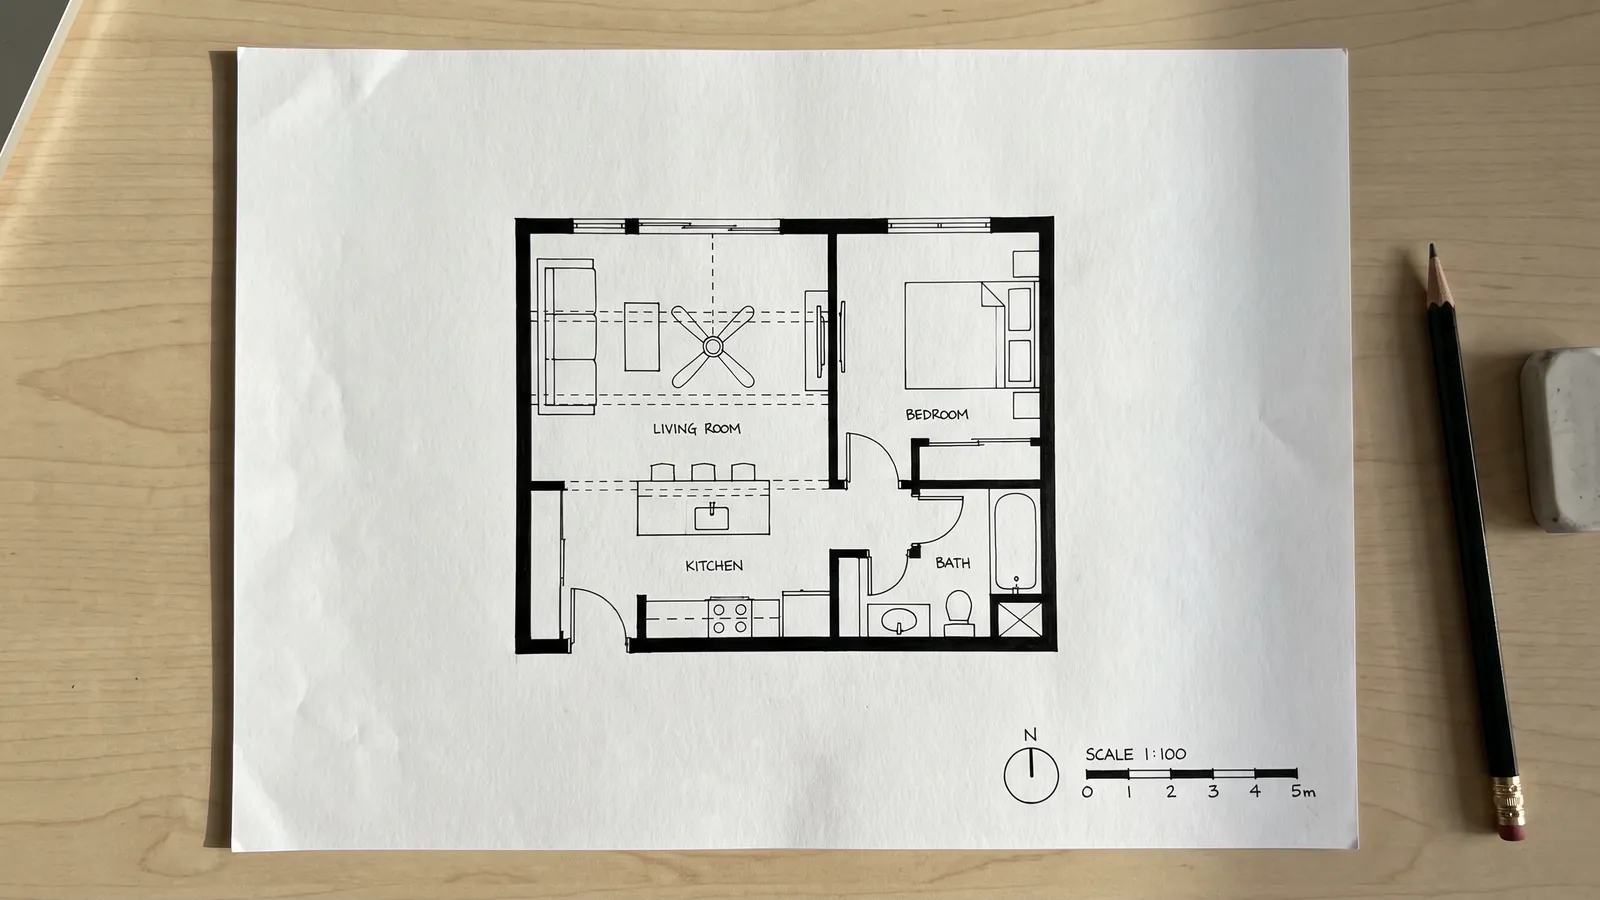
Read a plan in four steps: find the scale, find the north arrow, find the entrance, then walk the plan mentally from that entrance through each room.
The hidden key is line weight, and it unlocks most confusion in one paragraph:
- Thick solid lines are solid material the cut passes through. Almost always walls.
- Thin lines are things seen below the cut, looking down at them: furniture, fixtures, floor finishes.
- Dashed lines are things above the cut or hidden from view: wall cabinets, beams, an overhang, the floor above.
Once you know that, a plan stops being a code and becomes a picture. Everything else on this page is vocabulary.
Walls, doors and windows
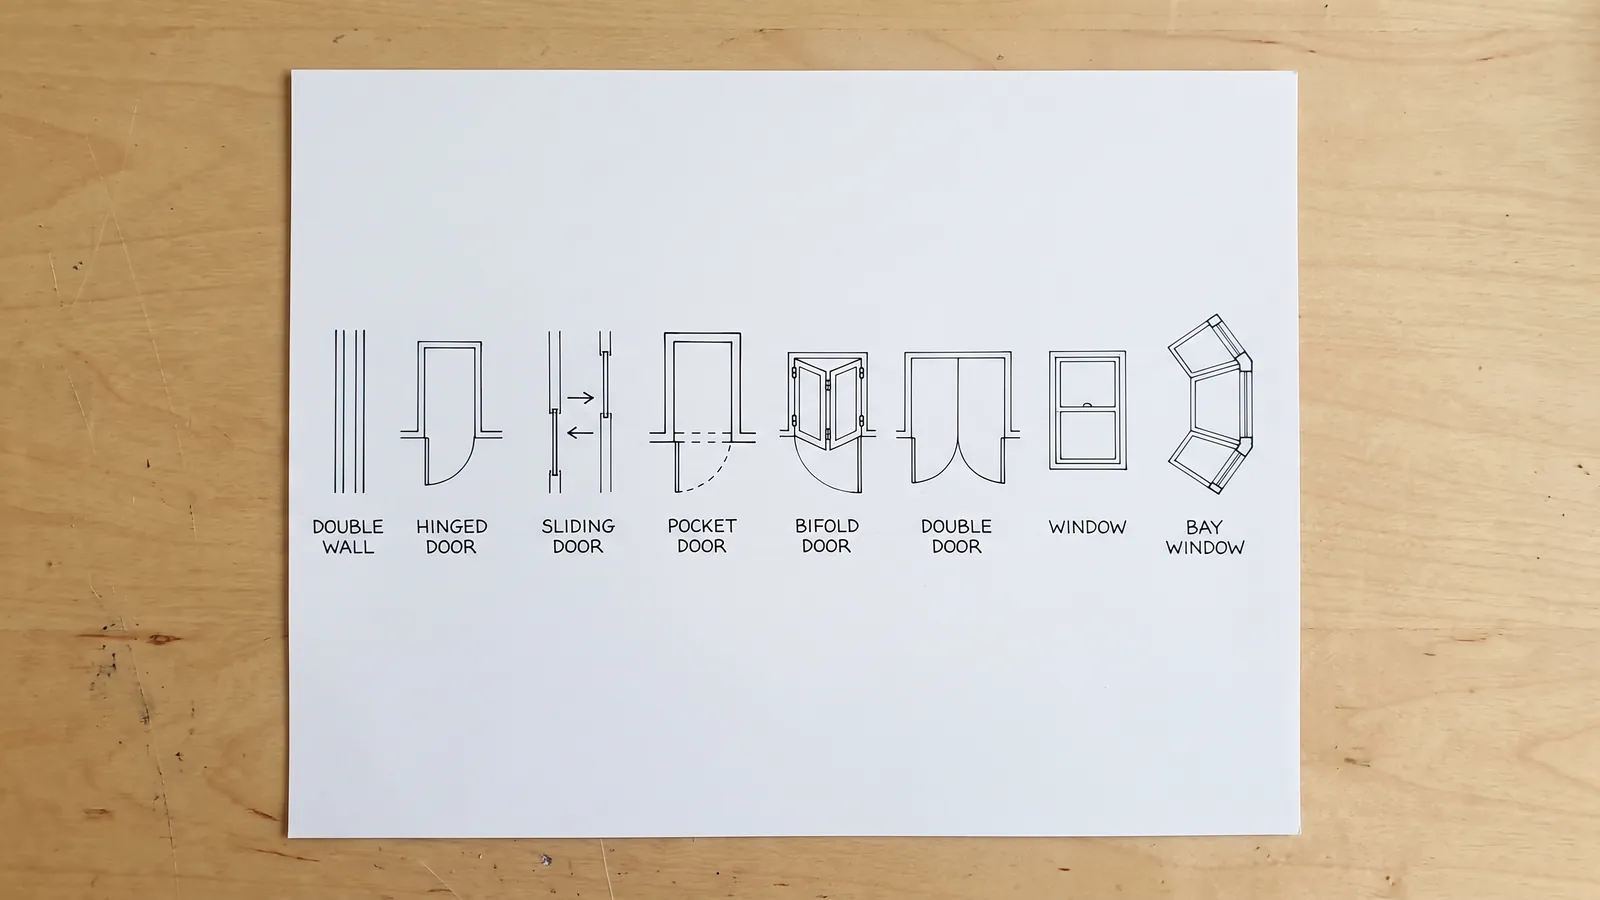
A wall is drawn as two parallel lines, and the gap between them is the real thickness. That gap is information: interior partitions run 10 to 12 cm and exterior walls 25 to 40 cm, so a thicker wall on a plan usually means an external or structural one. Some drawings fill the gap with hatching, called poche, to mark load-bearing walls specifically.
A door is a gap in the wall plus a quarter-circle arc showing which way it swings. The variants:
- Hinged door: the gap plus one quarter-circle arc.
- Double doors: two arcs meeting in the middle.
- Sliding door: a panel drawn beside or across the opening, with no arc.
- Pocket door: a panel drawn disappearing into the wall thickness, again no arc.
- Bifold: a shallow zigzag showing the folded panels.
A window is a thinner line, or a set of three thin lines, drawn within the wall thickness. A bay window projects beyond the wall line as its own small shape.
The most useful and most ignored information on any plan is the door swing direction. The arc is not decoration: it is floor you cannot furnish. How to draw a floor plan covers drawing these correctly.
What does a dashed line mean on a floor plan?
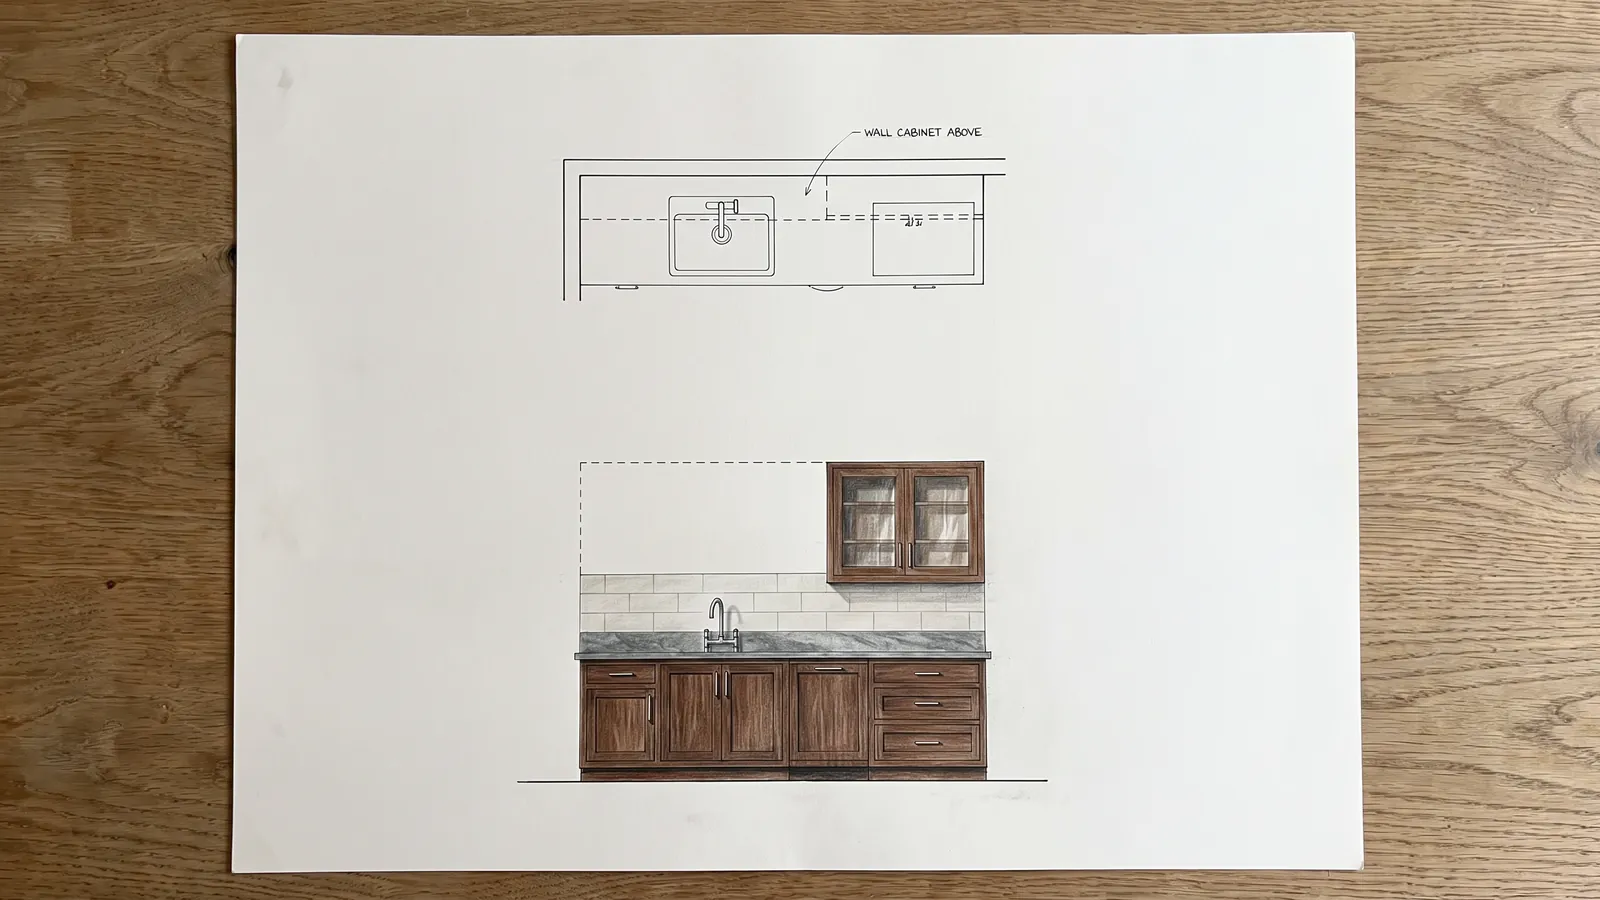
A dashed line means something that exists but is not visible at the cut height, which is about a metre above the floor.
Four things account for nearly all of them:
- Wall cabinets above a counter. The most common by far. The counter is drawn solid and the cupboards above it are dashed.
- A beam running across the ceiling, drawn as a long dashed line through the rooms it crosses.
- An overhang or canopy projecting beyond the wall below it.
- The outline of the floor above, shown on a ground floor plan so you can see how the storeys relate.
Reading dashed lines correctly is the thing that separates people who can read a plan from people who think they can. If a dashed rectangle sits over your kitchen counter, that is 30 to 35 cm of cupboard hanging 45 to 60 cm above the worktop, and it is why the plan appears to show two counters.
Stairs, levels and break lines
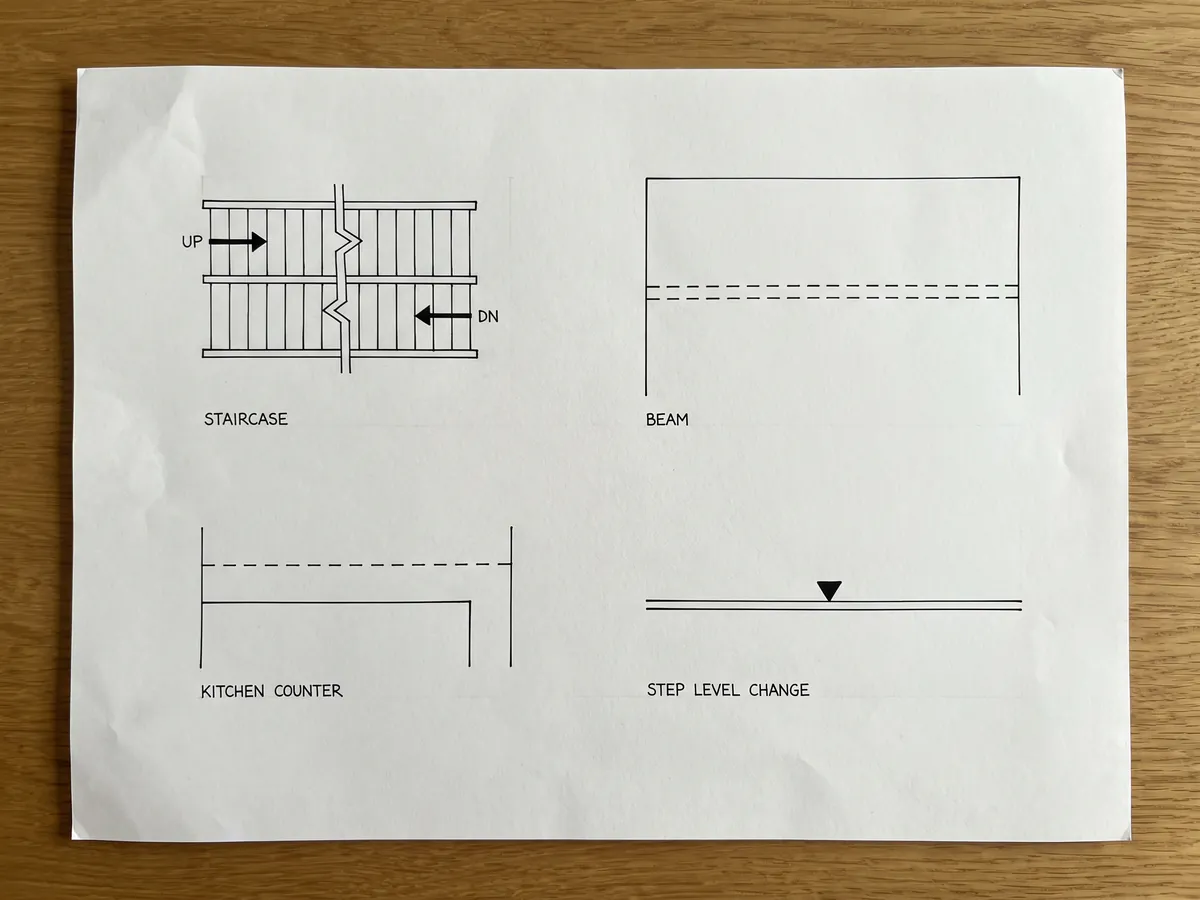
Stairs are drawn as a run of parallel lines, one per tread, with an arrow showing the direction of travel and the letters UP or DN relative to the floor you are looking at.
The diagonal line crossing them partway is a break line, and it marks where the staircase passes through the cut plane. Above that line you are seeing the underside of the flight continuing up, which is why the treads often stop being drawn there.
A level change within a floor, such as a single step down into a living room, is drawn as a doubled line with a small marker or an arrow, and sometimes a level figure. On a plan it is easy to miss entirely, and it is worth looking for, because a step is the difference between a room that is accessible and one that is not.
Kitchen and bathroom fixtures
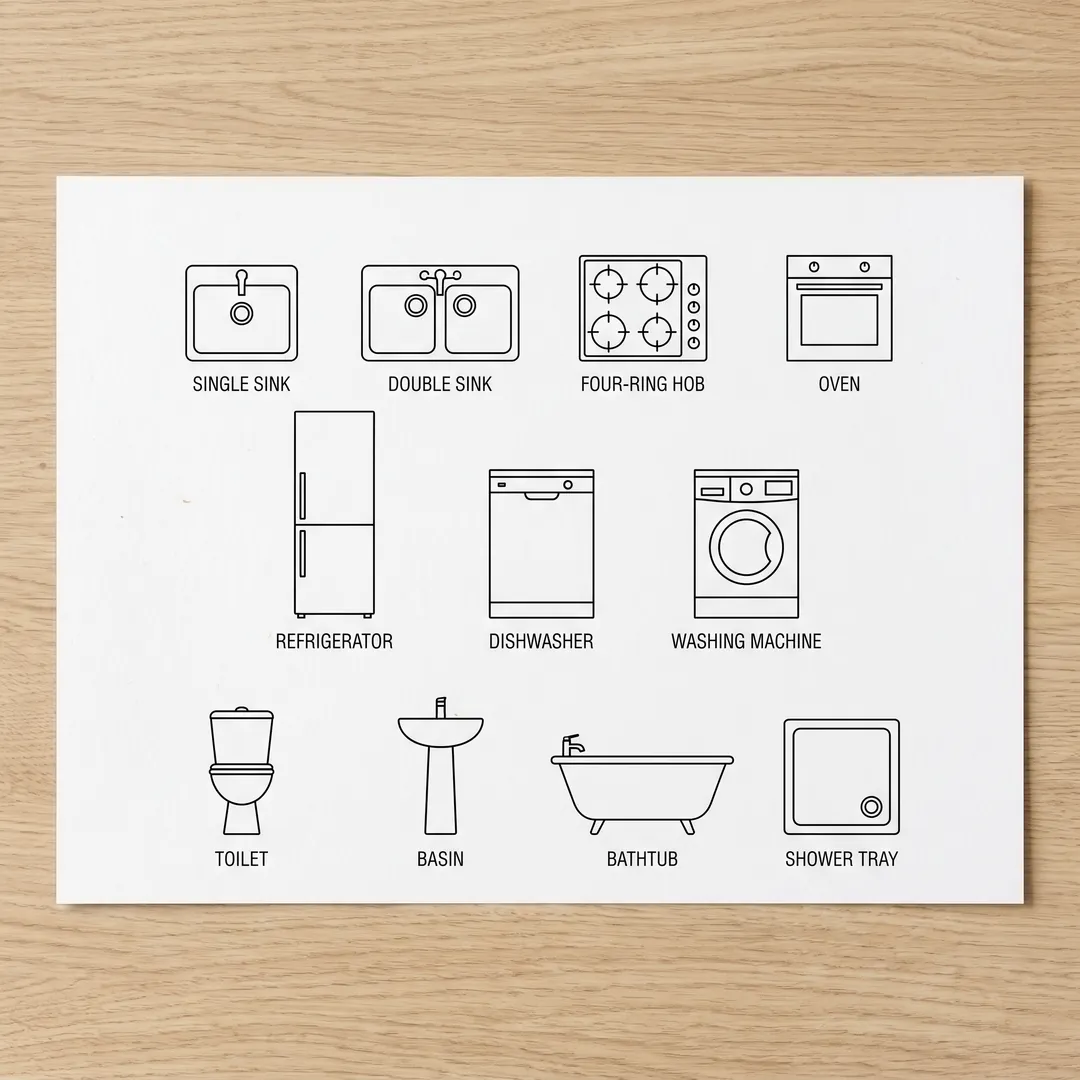
Fixtures are drawn as simplified outlines at their true size, and the size on the plan is meaningful rather than decorative. On the plan itself they are seen from above; reference sheets like the one here often draw them more pictorially so each is easy to recognise.
In the kitchen: a sink as one or two rounded rectangles with a small circle for the waste, a hob as four circles in a square, an oven as a square with a line across it, and appliances as plain rectangles at their real footprint, typically 60 cm wide.
In the bathroom: a toilet as a rounded shape against the wall with its cistern, a basin as a rounded rectangle or circle, a bath as a long rectangle with a rounded inner line and a small circle for the drain, and a shower tray as a square with a drain and often a diagonal.
The practical reading tip: appliance doors are frequently drawn with swing arcs too, and in a small kitchen those arcs are where the layout succeeds or fails. A dishwasher door drops about 55 cm into the walkway, and if the plan shows a 100 cm gap between runs, that gap becomes 45 cm when it is open. Standard room dimensions has the clearances these fixtures need.
Electrical and service symbols
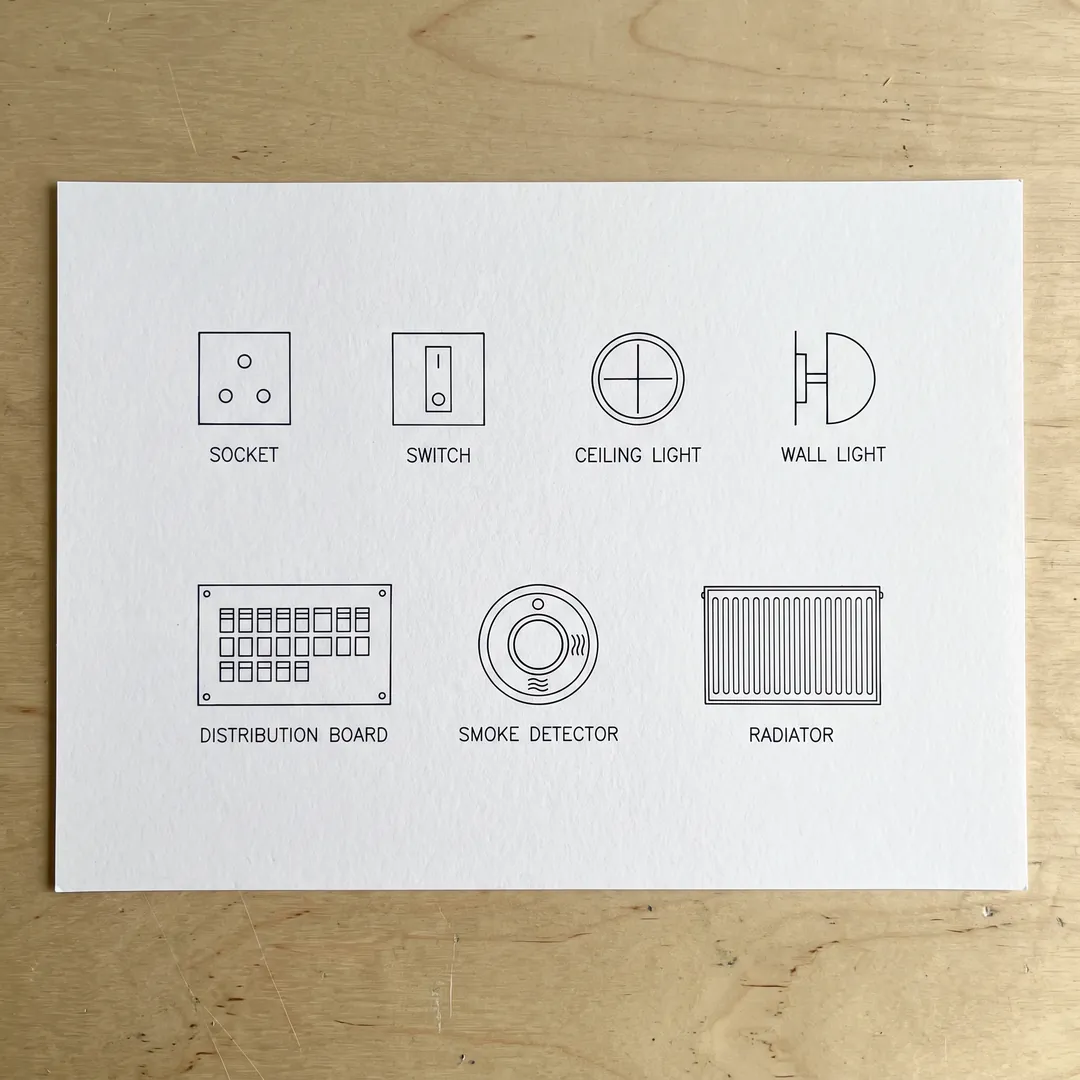
You meet these mostly on builder drawings rather than listing plans: a socket as a semicircle or a circle with lines, a switch as a small circle with a diagonal stroke, a ceiling light as a circle with a cross, a wall light as a half circle against the wall, a distribution board as a labelled rectangle, a smoke detector as a small circle with SD, and a radiator as a long thin rectangle against a wall.
Electrical conventions vary between countries considerably more than architectural ones do. A socket symbol that means one thing on a British drawing may mean something else on a German one.
Which leads to the habit worth forming: always read the legend if the drawing has one. The drawing's own key overrides every general reference including this page, and a plan with a legend is telling you exactly how to read itself.
Dimensions, scale and abbreviations
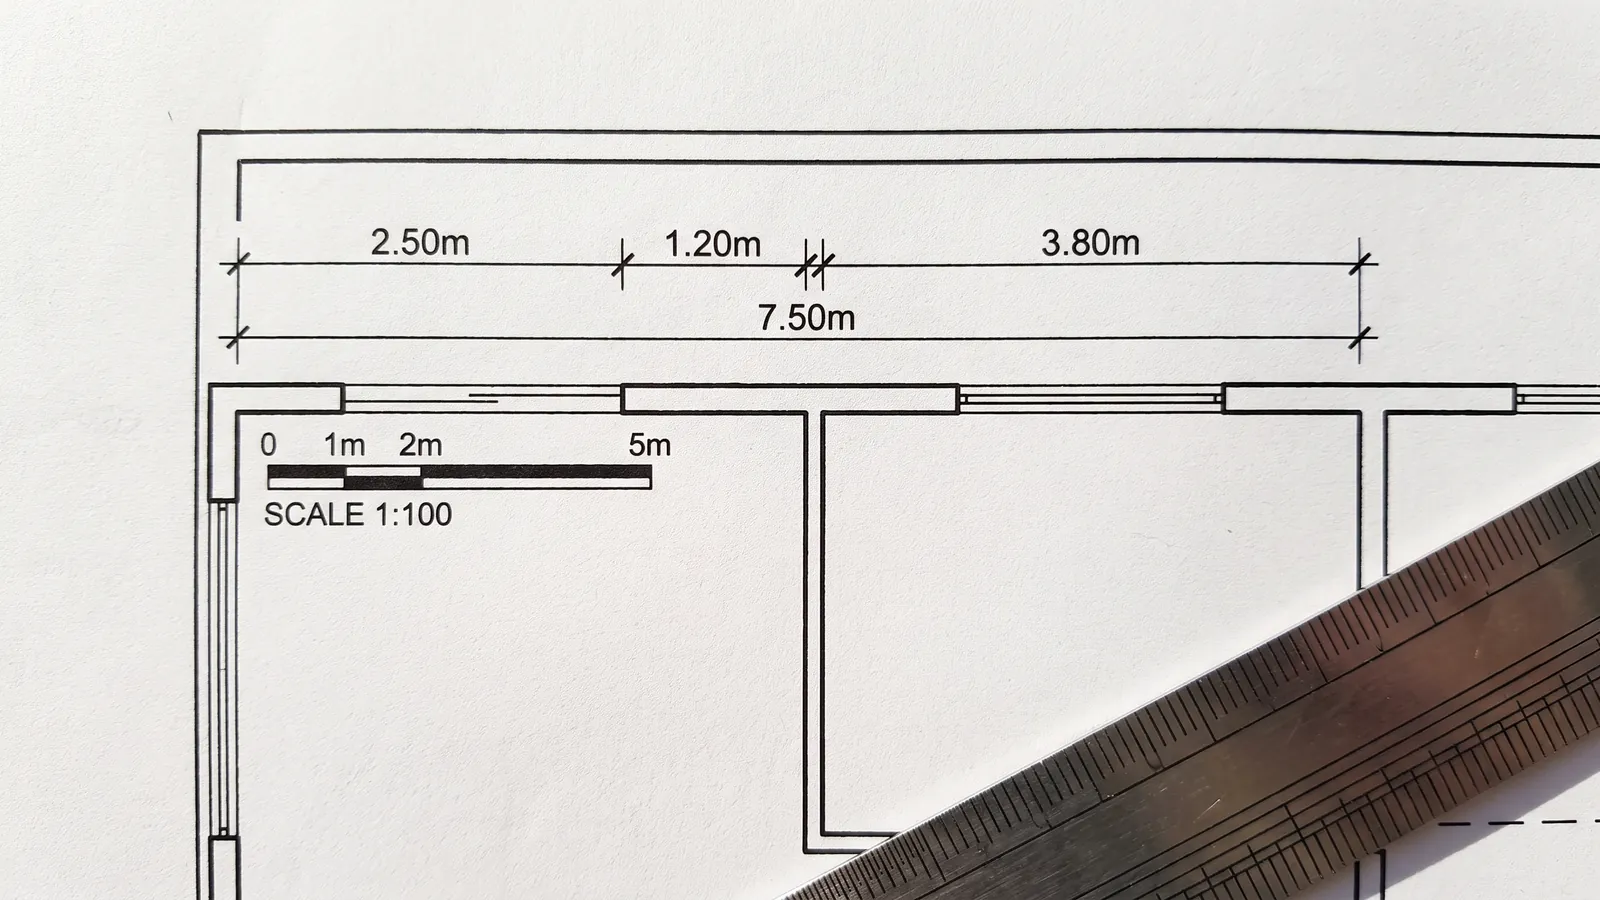
Dimension lines run parallel to what they measure, ending in arrows or angled ticks, with the figure written above the line. Measurements are normally taken wall face to wall face.
Plans usually carry two rows: a chained row breaking one side into its segments, and an overall row beneath giving the total. If the segments do not sum to the overall, something on the drawing is wrong, and that check takes ten seconds.
Scale tells you the ratio. At 1:50, one unit on paper is fifty in reality, so 1 cm on the drawing is 50 cm in the room. Common choices are 1:100 for a whole house, 1:50 for one floor and 1:20 for a single room. A scale bar does the same job graphically and survives photocopying, which a written ratio does not.
Abbreviations you will meet: WC is a toilet, WM a washing machine, DW a dishwasher, REF a refrigerator, CL ceiling level, FFL finished floor level, and UP and DN on stairs. These are not fully standardised, so the legend governs.
The check worth remembering: a plan with no scale and no dimensions is a sketch, and you cannot measure from it however neat it looks. How to measure a room covers getting real numbers when the drawing will not give them to you.
Read the legend before anything else
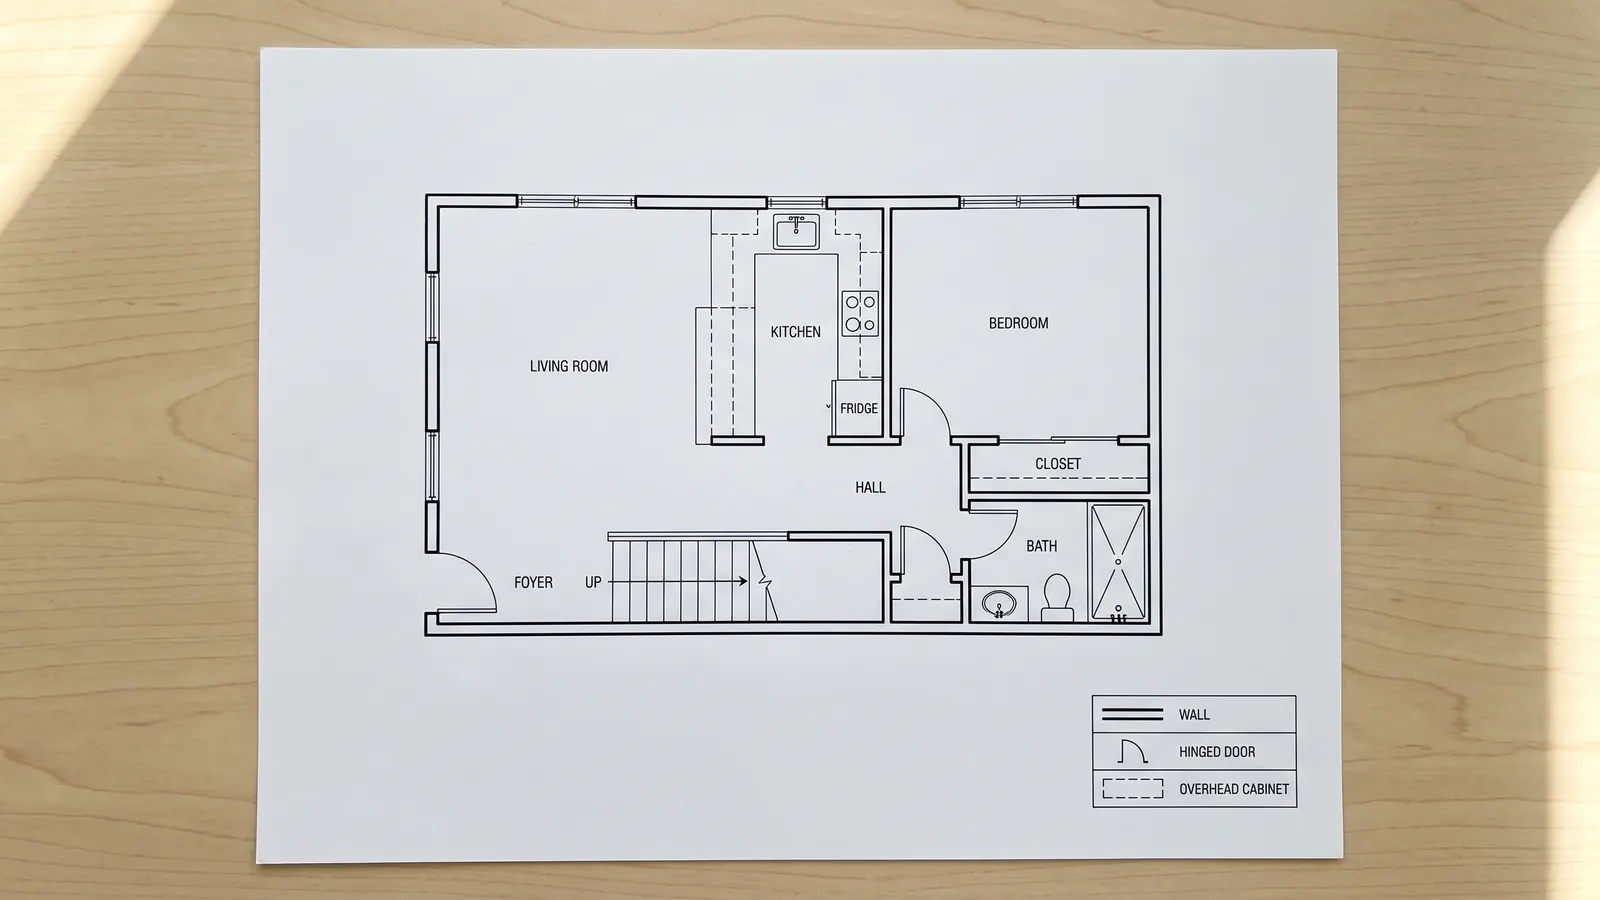
The mistake that causes the most misreading is assuming symbols are standardised. They are conventional, which is a weaker thing, and the variation is wider than most people expect.
Wall hatching is the clearest example. On one drawing, hatched walls mean load-bearing and unhatched mean partition, which is genuinely useful structural information. On another, every wall is hatched because that is the office's house style, and the hatching means nothing at all. Read the first as the second and you conclude a wall can be removed when it cannot.
The same applies across the board. Some drawings dash anything overhead; others dash only what is structural. Some mark every socket; others mark none. Country conventions differ, office styles differ, and software defaults differ.
So the first thing to look for on any unfamiliar plan is the legend, usually a box in a corner listing the symbols that drawing uses. If there is one, it is authoritative and it takes thirty seconds to read. If there is not, treat structural readings as provisional, and never conclude a wall is non-structural from hatching alone. That question goes to an engineer, and it is one of the few on this page where being wrong is dangerous rather than inconvenient.
The same plan, as symbols and as a real room
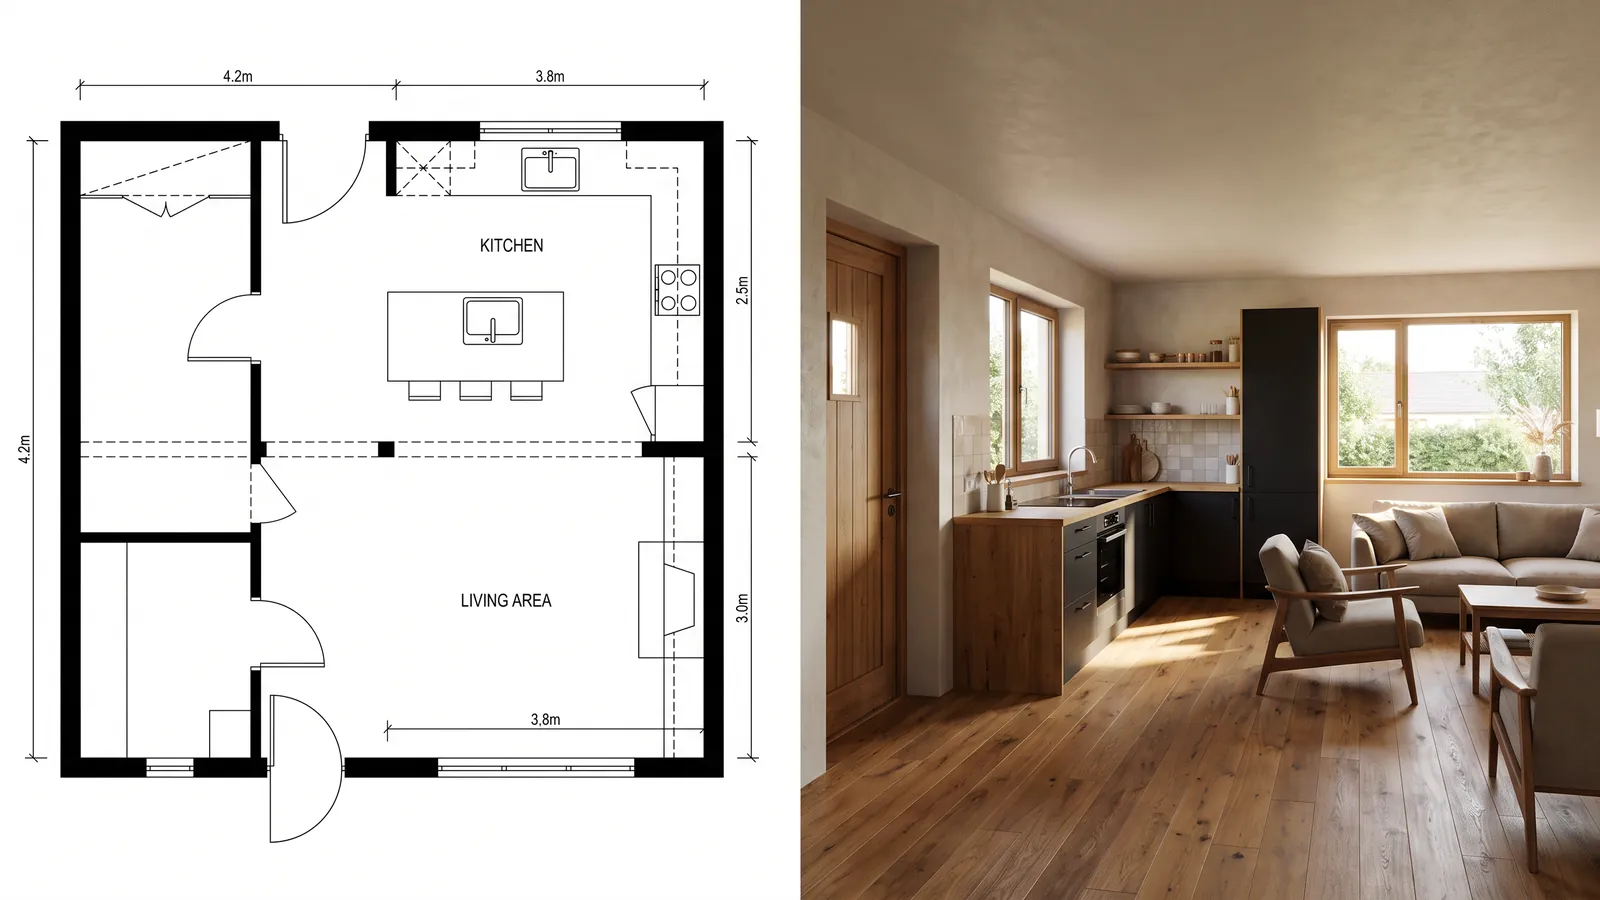
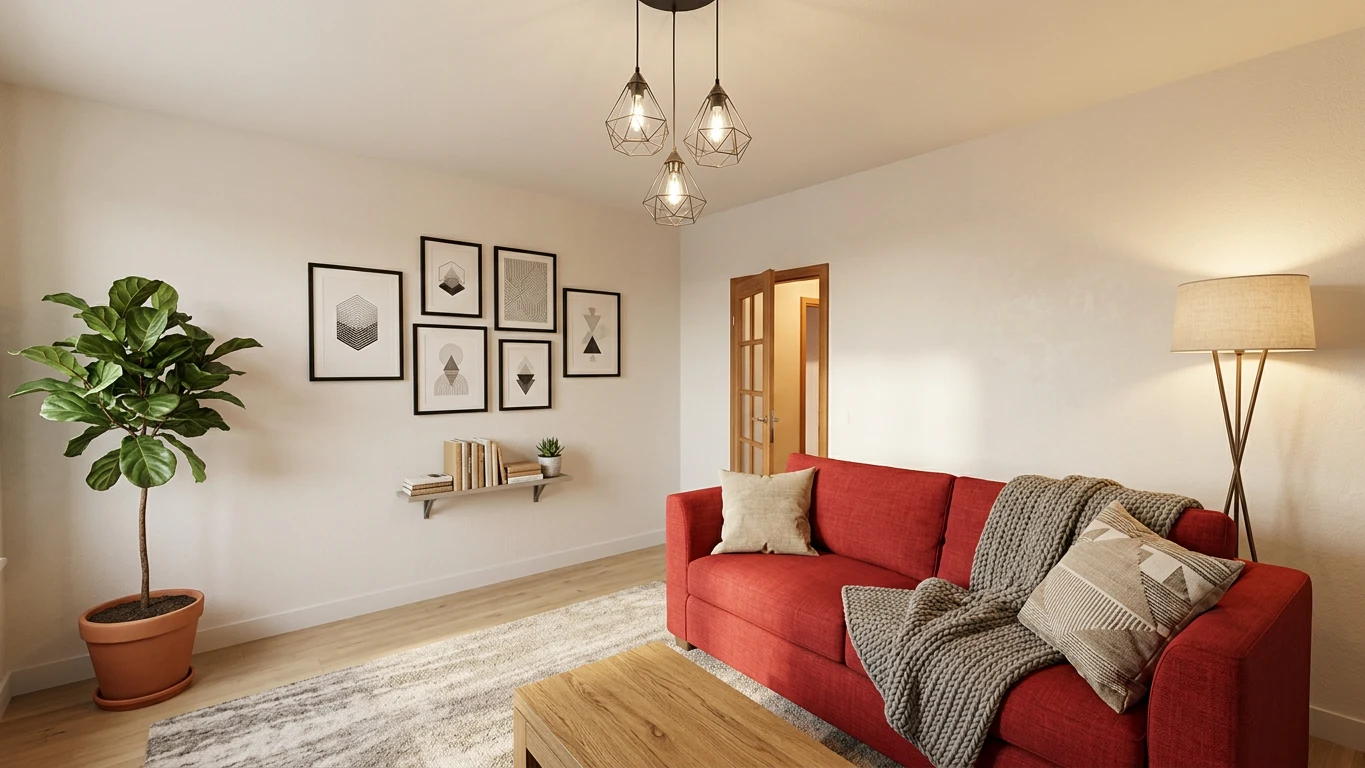
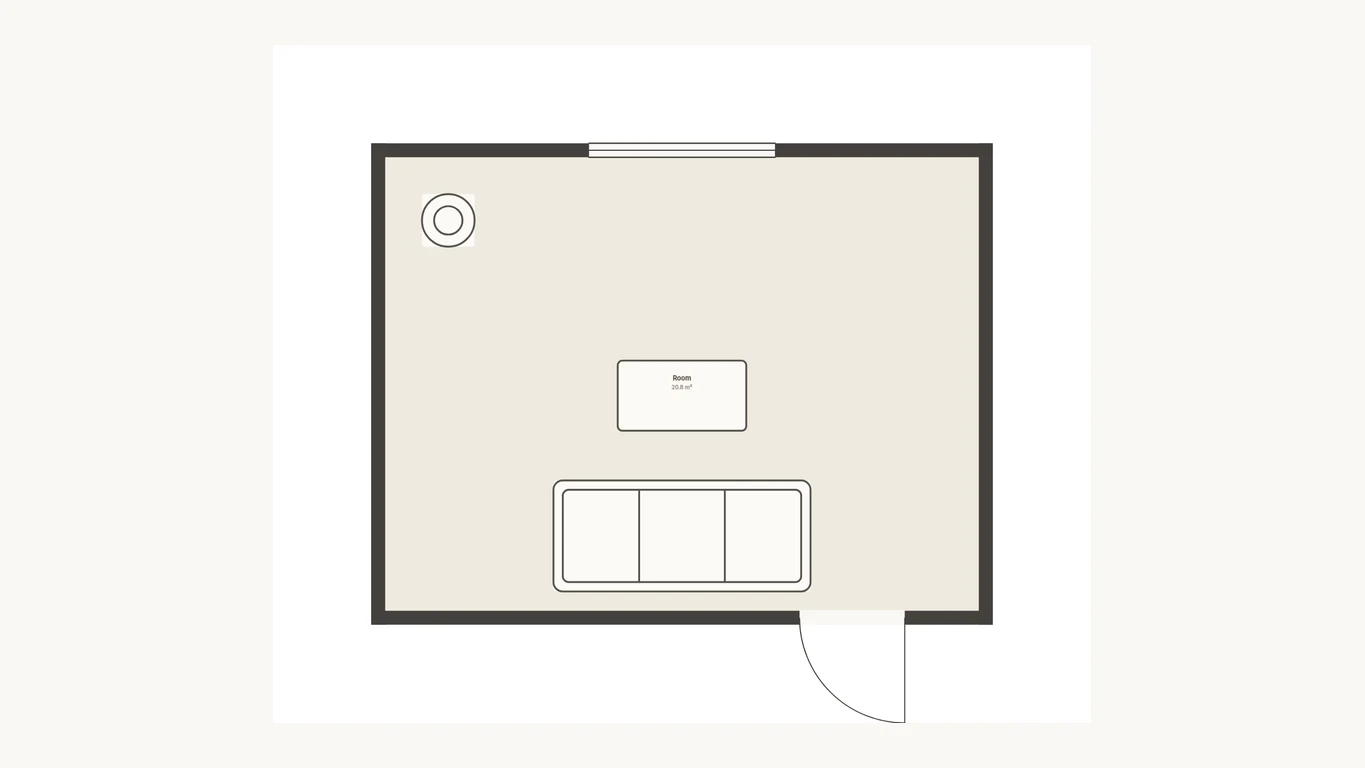
Here is the mapping, symbol by symbol, on one kitchen and living area.
The quarter-circle by the entrance is the door, and the arc tells you it opens toward you into the room, which is why nothing stands in that corner. The dashed rectangle running above the counter line is the wall cabinets, hanging about 50 cm above the worktop. The three thin parallel lines in the outer wall are the window, and the thin rectangle just inside them is the sill you can now see has depth. The four small circles are the hob. The long thin rectangle under the window is a radiator, which is why the sofa is not against that wall.
Reading symbols is a skill and it takes practice. Seeing the plan built removes the need for the practice, which is the fastest way to learn to read plans at all: look at the drawing, look at the space, and the vocabulary attaches itself.
Read your own plan
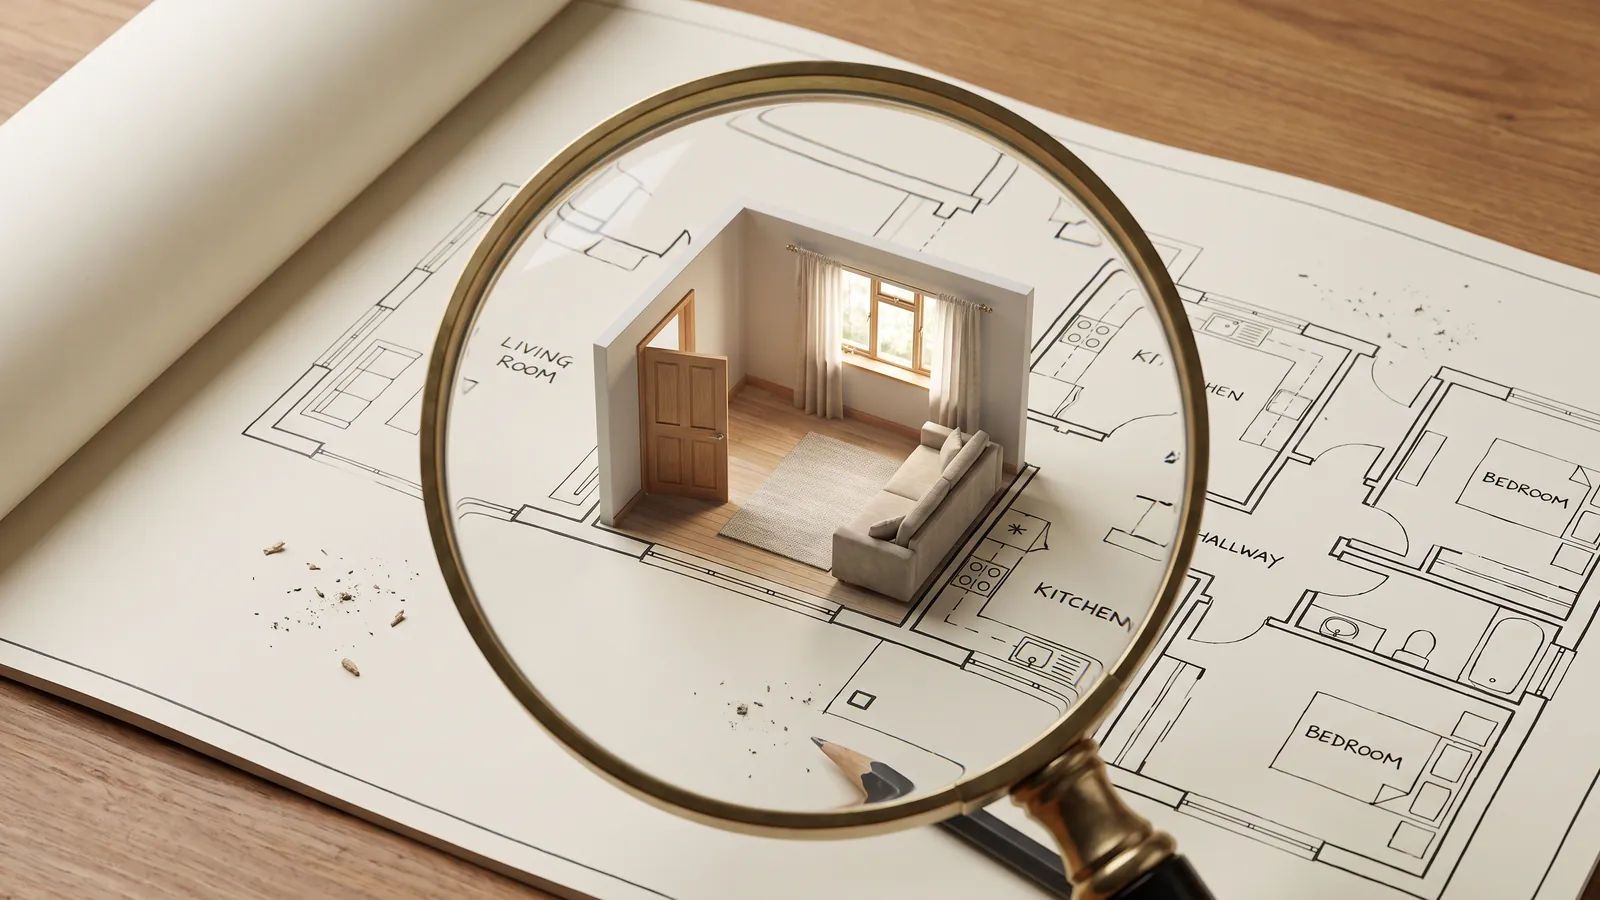
The quickest way to learn this vocabulary is on a plan you care about.
- Photograph or upload the plan you already have, or draw one if you do not.
- Set the scale from one real measured width.
- Switch to 3D and walk in, then look back at the drawing.
The abstraction becomes concrete, and the symbols stop needing to be memorised. Tracing, drawing, walking through and exporting are free and need no account; the photoreal render is the paid step, on a subscription. Open the planner with your plan, or see how the floor plan creator works first. For the full conversion, floor plan to 3D covers what a plan becomes once it stands up.
Frequently asked questions
What does a dashed line mean on a floor plan? +
Something that exists but is not visible at the cut height, about a metre above the floor. Most often it is a wall cabinet above a counter, and otherwise a beam, an overhang, or the outline of the floor above.
How do you show a door on a floor plan? +
As a gap in the wall with a quarter-circle arc showing the swing direction. Sliding and pocket doors are drawn as a panel with no arc, and a bifold as a shallow zigzag showing the folded panels.
What does the arc on a door symbol mean? +
The path the door sweeps, and therefore the floor you cannot furnish. An 80 cm door claims about 0.5 m2, which is why the arc is information rather than decoration.
How are stairs shown on a floor plan? +
As a run of parallel lines, one per tread, with an arrow and the letters UP or DN relative to the floor shown. The diagonal line crossing them is a break line marking where the flight passes through the cut plane.
What does 1:50 scale mean? +
One unit on the drawing equals fifty in reality, so 1 cm on paper is 50 cm in the room. 1:100 suits a whole house, 1:50 a single floor, and 1:20 one room where placement matters to the centimetre.
What does WC or FFL mean on a plan? +
WC is a toilet and FFL is finished floor level. Others you will meet are WM for washing machine, DW for dishwasher, REF for refrigerator and CL for ceiling level. Abbreviations are not standardised, so the drawing's own legend governs.
How do I know which walls are load-bearing on a plan? +
You often cannot, and hatching alone does not tell you. On some drawings hatched walls mean load-bearing, on others every wall is hatched as house style. Read the legend, and send the structural question to an engineer.
Why are some lines on a plan thicker than others? +
Line weight is the hidden key. Thick lines are solid material the cut passes through, almost always walls. Thin lines are things seen below the cut such as furniture and fixtures. Dashed lines are above the cut or hidden.
 After
After
 Before
Draw it, then walk it
Your plan, built and rendered
Draw the floor plan free in your browser, walk it in 3D, and one click renders the finished home in your style.
Draw your plan and see it realDraw it free. Walk it in 3D. No signup.